
この頃は、プライバシー保護や情報の改ざんといったものへの対策としてセキュリティヘッダーの送信も重要になってきています。
この記事では、Cloudflareのプロキシを使ってWebサーバーを公開している人向けにセキュリティヘッダーの送信の仕方を解説していきます。
この記事が向いている人
- Cloudflareのプロキシを通じてサーバーを外部公開している人
- セキュリティヘッダーへの対策をしたい人
- セキュリティヘッダーテストでA以上を取りたい人
今回使用するもの
- Cloudflareのアカウント(プロキシ設定済み)
設定開始!
Cloudflareにログイン&Workersを開く
Cloudflareのサイトにログインします。
その後、[Webサイト] → [設定するドメイン] → [Workers ルート]を開きます。
すると下のような画面になるはずです。(設定済みになっていますがお気になさらず)
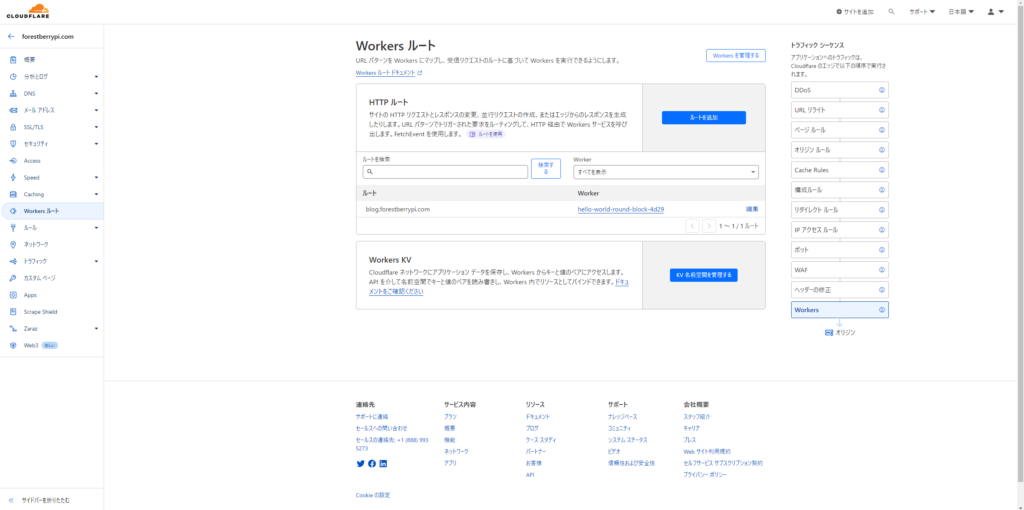
この画面から、[Workersを管理する]を開きます。
Workersを作成
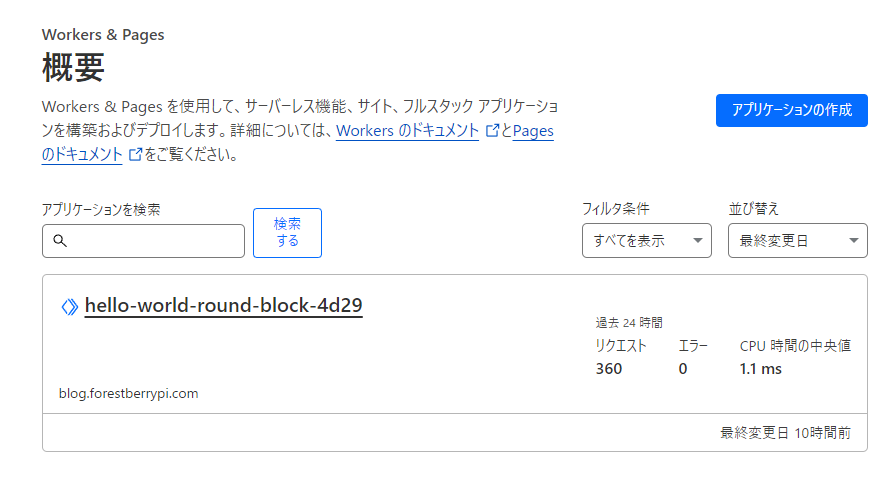
この画面の[アプリケーションの作成]というところをクリックします。
そして、[ワーカーの作成]を押し
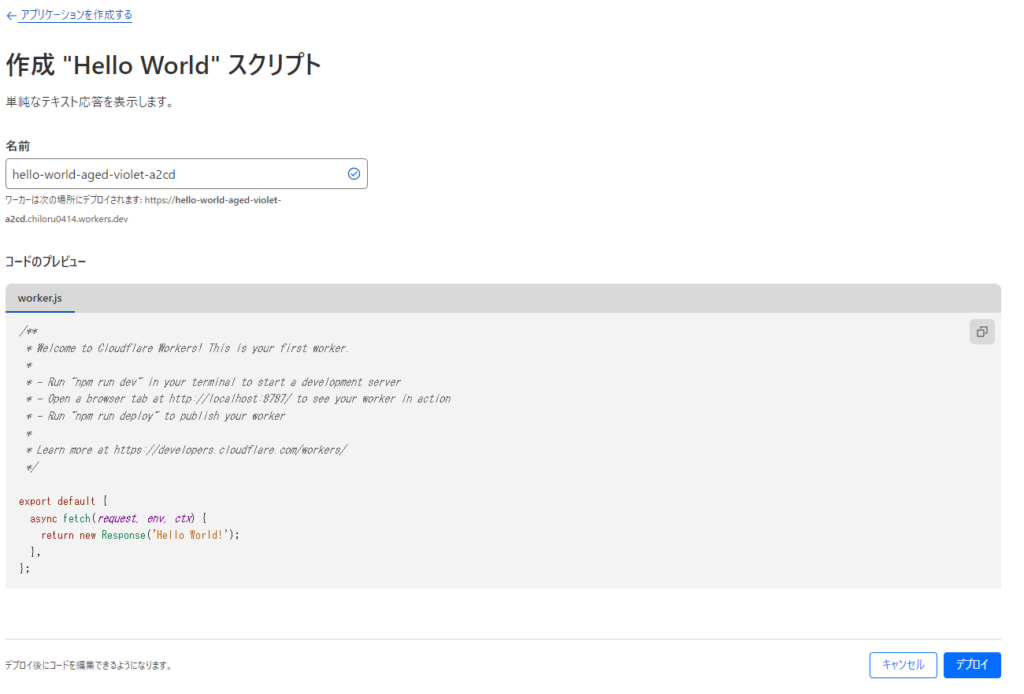
[デプロイ]をクリックするとワーカーが作成されます。
その後編集できるようになるため、[コードを編集]を押します。
そして、デフォルトのコードをすべて消去し、下記のコードをコピペします。
export default {
  async fetch(request) {
    const DEFAULT_SECURITY_HEADERS = {
      /*
    Secure your application with Content-Security-Policy headers.
    Enabling these headers will permit content from a trusted domain and all its subdomains.
    @see https://developer.mozilla.org/en-US/docs/Web/HTTP/Headers/Content-Security-Policy
    "Content-Security-Policy": "default-src 'self' example.com *.example.com",
    */
      /*"Content-Security-Policy": "default-src 'self'; connect-src 'self' cdn.jsdelivr.net;",*/
      "Content-Security-Policy" : "upgrade-insecure-requests",
    /*
    You can also set Strict-Transport-Security headers.
    These are not automatically set because your website might get added to Chrome's HSTS preload list.
    Here's the code if you want to apply it:
    "Strict-Transport-Security" : "max-age=63072000; includeSubDomains; preload",
    */
      "Strict-Transport-Security" : "max-age=63072000; includeSubDomains; preload",
      /*
    Permissions-Policy header provides the ability to allow or deny the use of browser features, such as opting out of FLoC - which you can use below:
    "Permissions-Policy": "interest-cohort=()",
    */
      "Permissions-Policy": "interest-cohort=()",
      /*
    X-XSS-Protection header prevents a page from loading if an XSS attack is detected.
    @see https://developer.mozilla.org/en-US/docs/Web/HTTP/Headers/X-XSS-Protection
    */
      "X-XSS-Protection": "0",
      /*
    X-Frame-Options header prevents click-jacking attacks.
    @see https://developer.mozilla.org/en-US/docs/Web/HTTP/Headers/X-Frame-Options
    */
      "X-Frame-Options": "DENY",
      /*
    X-Content-Type-Options header prevents MIME-sniffing.
    @see https://developer.mozilla.org/en-US/docs/Web/HTTP/Headers/X-Content-Type-Options
    */
      "X-Content-Type-Options": "nosniff",
      "Referrer-Policy": "strict-origin-when-cross-origin",
      "Cross-Origin-Embedder-Policy": 'require-corp; report-to="default";',
      "Cross-Origin-Opener-Policy": 'same-site; report-to="default";',
      "Cross-Origin-Resource-Policy": "same-site",
    };
    const BLOCKED_HEADERS = [
      "Public-Key-Pins",
      "X-Powered-By",
      "X-AspNet-Version",
    ];

    let response = await fetch(request);
    let newHeaders = new Headers(response.headers);

    const tlsVersion = request.cf.tlsVersion;
    console.log(tlsVersion);
    // This sets the headers for HTML responses:
    if (
      newHeaders.has("Content-Type") &&
      !newHeaders.get("Content-Type").includes("text/html")
    ) {
      return new Response(response.body, {
        status: response.status,
        statusText: response.statusText,
        headers: newHeaders,
      });
    }

    Object.keys(DEFAULT_SECURITY_HEADERS).map((name) => {
      newHeaders.set(name, DEFAULT_SECURITY_HEADERS[name]);
    });

    BLOCKED_HEADERS.forEach((name) => {
      newHeaders.delete(name);
    });

    if (tlsVersion !== "TLSv1.2" && tlsVersion !== "TLSv1.3") {
      return new Response("You need to use TLS version 1.2 or higher.", {
        status: 400,
      });
    } else {
      return new Response(response.body, {
        status: response.status,
        statusText: response.statusText,
        headers: newHeaders,
      });
    }
  },
};編集が完了したら[デプロイ]を押して保存、元のページに戻ります。
設定したWorkersをルートに組み込む
[Webサイト]の中にある[Workers ルート]を再度開きます。
そして、[ルートを追加]を押します。
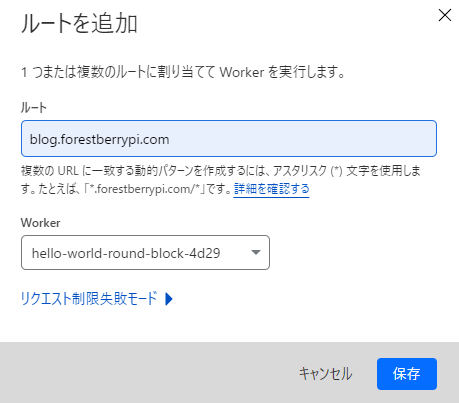
[ルート]に適用したいドメイン名(*も可)を入力し、
[Worker]に先ほど設定したWorkerを選択します。
これで全行程完了です!
再度テスト
セキュリティヘッダーテストを開き、設定したドメインの判定をします。
ついにA+を取ることができました~!

おわりに
いかがでしたでしょうか?
今回は、Cloudflareのプロキシを使用している方向けに、セキュリティヘッダーの送信方法について解説しました。
プロキシだけでこのようにいろいろな設定ができるCloudflareは偉大だなーと感じました。
この記事がどなたかの役に立てば幸いです。
それでは!



コメント